Lab 1 : Environment Setup and Profiling a Model#
Goal of this lab#
Introduction#
The CFU Playground is a handy frameworks composed of soft RISC-V SoC and platform for testing custom hardware unit. It abstracts away most of the tedious steps involved in details of building the SoC infrastructure when integrating hardware acceleration unit, allowing us to focus on designing our hardware accelerators and control it by executing some custom instructions.
Setting up the CFU-Playground Environment - 20%#
Note
For WSL (Windows Subsystem for Linux) users, the package usbipd-win may be necessary to connect USB devices to WSL.
1. Get the supported board#
Nexys A7-100T is used in this course, contact the TAs if you haven’t get one.
2. Clone the CFU-Playground Repository from the github#
$ git clone https://github.com/google/CFU-Playground.git
3. Run the setup script#
$ cd CFU-Playground
$ ./scripts/setup
4. Install Vivado#
Download Vivado
You may use 2023.2 or 2024.1
Make sure you can execute the installation binary before you start.
$ chmod +x FPGAs_AdaptiveSoCs_Unified_2023.2_1013_2256_Lin64.bin
$ ./FPGAs_AdaptiveSoCs_Unified_2023.2_1013_2256_Lin64.bin
Note
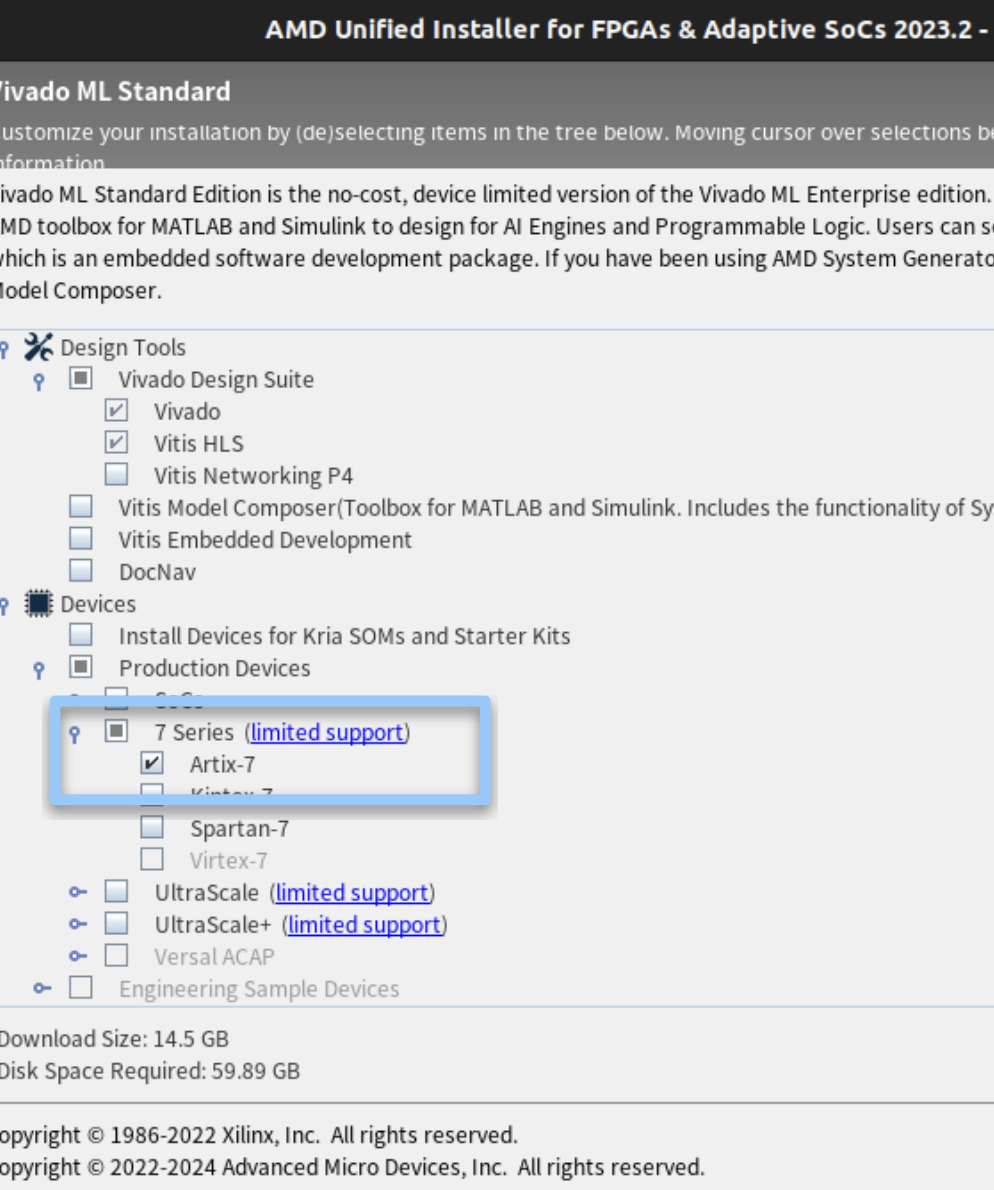
Since the full package of Vivado is pretty big, you may check only the Artix-7 option to save disk space and download time, and please note that the Vivado can take up to 8 hours to download, so plan to do that ahead of time!

Hint
After installing Vivado, add the Vivado binary to your PATH, put it in your .bashrc or .zshrc, otherwise you will have to add it every time using CFU playground.
export PATH=/path/to/tools/Xilinx/Vivado/<Vivado version>/bin:$PATH
5. Install RISC-V toolchain (Download linux-ubuntu)#

Download the August 2020 toolchain from freedom-tools and unpack the binaries to your home directory:
$ tar xvfz ~/Downloads/riscv64-unknown-elf-gcc-10.1.0-2020.08.2-x86_64-linux-ubuntu14.tar.gz
Add the toolchain to your PATH in your .bashrc or .zshrc:
export PATH=$PATH:$HOME/riscv64-unknown-elf-gcc-10.1.0-2020.08.2-x86_64-linux-ubuntu14/bin
6. Test Run#
Change the target board
Modify proj/proj.mk
export TARGET ?= digilent_nexys4ddr

Make Your Project
$ cp -r proj/proj_template_v proj/my_first_cfu
$ cd proj/my_first_cfu
Test run
Connect FPGA board to computer
Builds and programs gateware
$ make prog USE_VIVADO=1 TTY=/dev/ttyUSB0 (or any serial you are using)
Builds and loads C program (BUILD_JOBS=How many cores does your computer have)
$ make load BUILD_JOBS=4 TTY=/dev/ttyUSB1 (or any serial you are using)
now you should observe some output like this:
make[1]: Leaving Directory「/path/to/CFU-Playground/soc」
/path/to/CFU-Playground/soc/bin/litex_term --speed 1843200  --kernel /path/to/CFU-Playground/proj/my_first_cfu/build/software.bin /dev/ttyUSB1
Now press the “CPU_RESET” button on the board and follow the steps below:
Hint
If you are doing this on a remote server and can’t physically access the “CPU_RESET” button, after
make progandmake load, you may press “enter” and key inrebootinstead of pressing the “CPU_RESET”.


Porting the KWS model - 50%#
Checkout the architecture of the keyword spotting (KWS) model
Since CFU-Playground doesn’t have following two audio operators, so we should port them first before we port our KWS model:
Audio spectrogram
Mfcc
1. Download the patch file#
2. Put the patch file in CFU-Playground#
$ cd CFU-Playground
$ patch -p1 -i kws_tflm_audio_op.patch
3. Modify proj/proj.mk#
mkdir -p $(BUILD_DIR)/src/third_party/fft2d
$(COPY) $(TFLM_TP_DIR)/fft2d/fft.h $(BUILD_DIR)/src/third_party/fft2d
$(COPY) $(TFLM_TP_DIR)/fft2d/fft2d.h $(BUILD_DIR)/src/third_party/fft2d
$(COPY) $(TFLM_TP_DIR)/fft2d/fft4g.c $(BUILD_DIR)/src/third_party/fft2d

Now we are ready for porting the model!#
4. Create a folder for KWS model#
$ cd CFU-Playground/common/src/models/
$ mkdir ds_cnn_stream_fe
$ cd ds_cnn_stream_fe
5. Download the tflite file and input files#
The tflite file ds_cnn_stream_fe.tflite
The input file label.zip
Put
ds_cnn_stream_fe.tfliteinCFU-Playground/common/src/models/ds_cnn_stream_fe/Unzip
label.zipinCFU-Playground/common/src/models/
6. Create files to run inference on the model#
CFU-Playground/common/src/models/ds_cnn_stream_fe/ds_cnn.h#
#ifndef _DS_CNN_STREAM_FE_H
#define _DS_CNN_STREAM_FE_H

#ifdef __cplusplus
extern "C" {
#endif

// For integration into menu system
void ds_cnn_stream_fe_menu();

#ifdef __cplusplus
}
#endif

#endif  // _DS_CNN_STREAM_FE_H
CFU-Playground/common/src/models/ds_cnn_stream_fe/ds_cnn.cc#
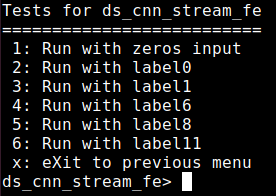
Design the following codes to run inference on the model. You need to use files in models/label/ as your inputs which have already include in the following codes. Then print all 12 output scores.
#include "models/ds_cnn_stream_fe/ds_cnn.h"
#include <stdio.h>
#include "menu.h"
#include "models/ds_cnn_stream_fe/ds_cnn_stream_fe.h"
#include "tflite.h"
#include "models/label/label0_board.h"
#include "models/label/label1_board.h"
#include "models/label/label6_board.h"
#include "models/label/label8_board.h"
#include "models/label/label11_board.h"


// Initialize everything once
// deallocate tensors when done
static void ds_cnn_stream_fe_init(void) {
  tflite_load_model(ds_cnn_stream_fe, ds_cnn_stream_fe_len);
}

// TODO: Implement your design here

static struct Menu MENU = {
    "Tests for ds_cnn_stream_fe",
    "ds_cnn_stream_fe",
    {
        MENU_END,
    },
};

// For integration into menu system
void ds_cnn_stream_fe_menu() {
  ds_cnn_stream_fe_init();
  menu_run(&MENU);
}
Note
You can refer to the codes of other models in common/src/models/ and use the functions in common/src/tflite.cc
Or refer from the below link for more details. How to run inference using TensorFlow Lite for Microcontrollers
Warning
Output scores should stored as uint32_t since we can’t print floats.
7. Modifying the files#
Add codes as below:
CFU-Playground/common/src/models/models.c#
#include "models/ds_cnn_stream_fe/ds_cnn.h"


/* ... some code ... */


#if defined(INCLUDE_MODEL_DS_CNN_STREAM_FE)
        MENU_ITEM(AUTO_INC_CHAR, "Ds cnn stream fe", ds_cnn_stream_fe_menu),
#endif
CFU-Playground/common/src/tflite.cc#
Set the kTensorArenaSize. You should set the “size” below.
#ifdef INCLUDE_MODEL_DS_CNN_STREAM_FE
    3000 * 1024,
#endif
Note
The size of kTensorArenaSize will depend on the model you’re using, and may need to be determined by experimentation. You may try all over different size to get minimal value.
CFU-Playground/proj/my_first_cfu/Makefile#
DEFINES += INCLUDE_MODEL_DS_CNN_STREAM_FE
#DEFINES += INCLUDE_MODEL_PDTI8
8. Running the project#
$ cd CFU-Playground/proj/my_first_cfu
$ make prog USEVIVADO=1 TTY=/dev/ttyUSB0 (or any serial you are using)
$ make load BUILD_JOBS=4 TTY=/dev/ttyUSB1 (or any serial you are using)
Press a number to run a test. (takes plenty of minutes)

Measuring the MAC cycles and DRAM usage for the KWS model - 20%#
Measuring the DRAM space required for a model - 5%#
1. Modify CFU-Playground/common/src/tflite.cc#
Add codes below:
printf("DRAM: %d bytes\n", interpreter->arena_used_bytes());

2. Run the project#
We can observe that KWS model has used 1934292 bytes of the memory space. (or around this amount)

Measuring the cycles of multiply-and-accumulate(MAC) operation required for a model. - 15%#
We can use the functions in CFU-Playground/common/src/perf.h to count the cycles of MAC operations.
1. Inside your project folder run the following:#
$ mkdir -p src/tensorflow/lite/kernels/internal/reference/integer_ops/
$ cp \
  ../../third_party/tflite-micro/tensorflow/lite/kernels/internal/reference/conv.h \
  src/tensorflow/lite/kernels/internal/reference/conv.h
This will create a copy of the convolution source code in your project directory. At build time your copy of the source code will replace the regular implementation.
2. Modify conv.h#
Open the newly created copy at proj/my_first_cfu/src/tensorflow/lite/kernels/ internal/reference/conv.h. Locate the innermost loop of the first function, it should look something like this:
for (int in_channel = 0; in_channel < filter_input_depth; ++in_channel) {
  float input_value = input_data[Offset(
      input_shape, batch, in_y, in_x, in_channel + group * filter_input_depth)];
  float filter_value = filter_data[Offset(
      filter_shape, out_channel, filter_y, filter_x, in_channel)];
total += (input_value * filter_value);
}
Add #include "perf.h" at the top of the file and then surround the inner loop with perf functions to count how many cycles this inner loop takes.
/* ... some code ... */

#include "perf.h"

/* ... some code ... */

perf_enable_counter(0);
for (int in_channel = 0; in_channel < filter_input_depth; ++in_channel) {
  float input_value = input_data[Offset(
      input_shape, batch, in_y, in_x, in_channel + group * filter_input_depth)];
  float filter_value = filter_data[Offset(
      filter_shape, out_channel, filter_y, filter_x, in_channel)];
total += (input_value * filter_value);
}
perf_disable_counter(0);
3. Run the project#
You must make clean first. To enable performance counters you should use the command below.
$ make clean
$ make prog EXTRA_LITEX_ARGS="--cpu-variant=perf+cfu"
$ make load
Note
The output shall look something like this, but note that the result is highly related to cache and DRAM, so you may get different result everytime.
You will receive all 15 points as long as you measure the MAC cycles correctly and 5 points for measuring the DRAM usage.
 Counter |  Total | Starts | Average |     Raw
---------+--------+--------+---------+--------------
    0    |  2464M | 2679000|   919   |   2463511289
    1    |     0  |     0  |   n/a   |            0
    2    |     0  |     0  |   n/a   |            0
    3    |     0  |     0  |   n/a   |            0
    4    |     0  |     0  |   n/a   |            0
    5    |     0  |     0  |   n/a   |            0
    6    |     0  |     0  |   n/a   |            0
    7    |     0  |     0  |   n/a   |            0
 38970M (  38970422645 )  cycles total
Questions in the Demo - 10%#
You will be asked several questions about the concepts covered in this lab and your implementation. This section accounts for 10% of the total lab score.
Submission#
Since this lab is all about setting up the enviornment, you DO NOT have to submit anything to E3.
Important
Screenshot the following:
The golden test with “passed” result.
Run any of the THREE labels using the KWS model.
the MAC cycles and the DRAM usage (only one label is required).
You will have to show your screenshots in the demo and explain your codes.

