Lab 0 : Environment Setup & simple verilog practice#
Important
You do not need to submit Lab 0; however, we strongly recommend that you ensure you have completed every step of the environment setup for Lab 0 before proceeding with subsequent assignments.
Lab source code#
TAs have prepared lab template for lab 0 and lab 1, however, you have to do lab2~4 based on previous lab, so remember to keep code clean and maintainable.
git clone https://github.com/nycu-caslab/CO2024_source.git
Development Tools Introduction:#
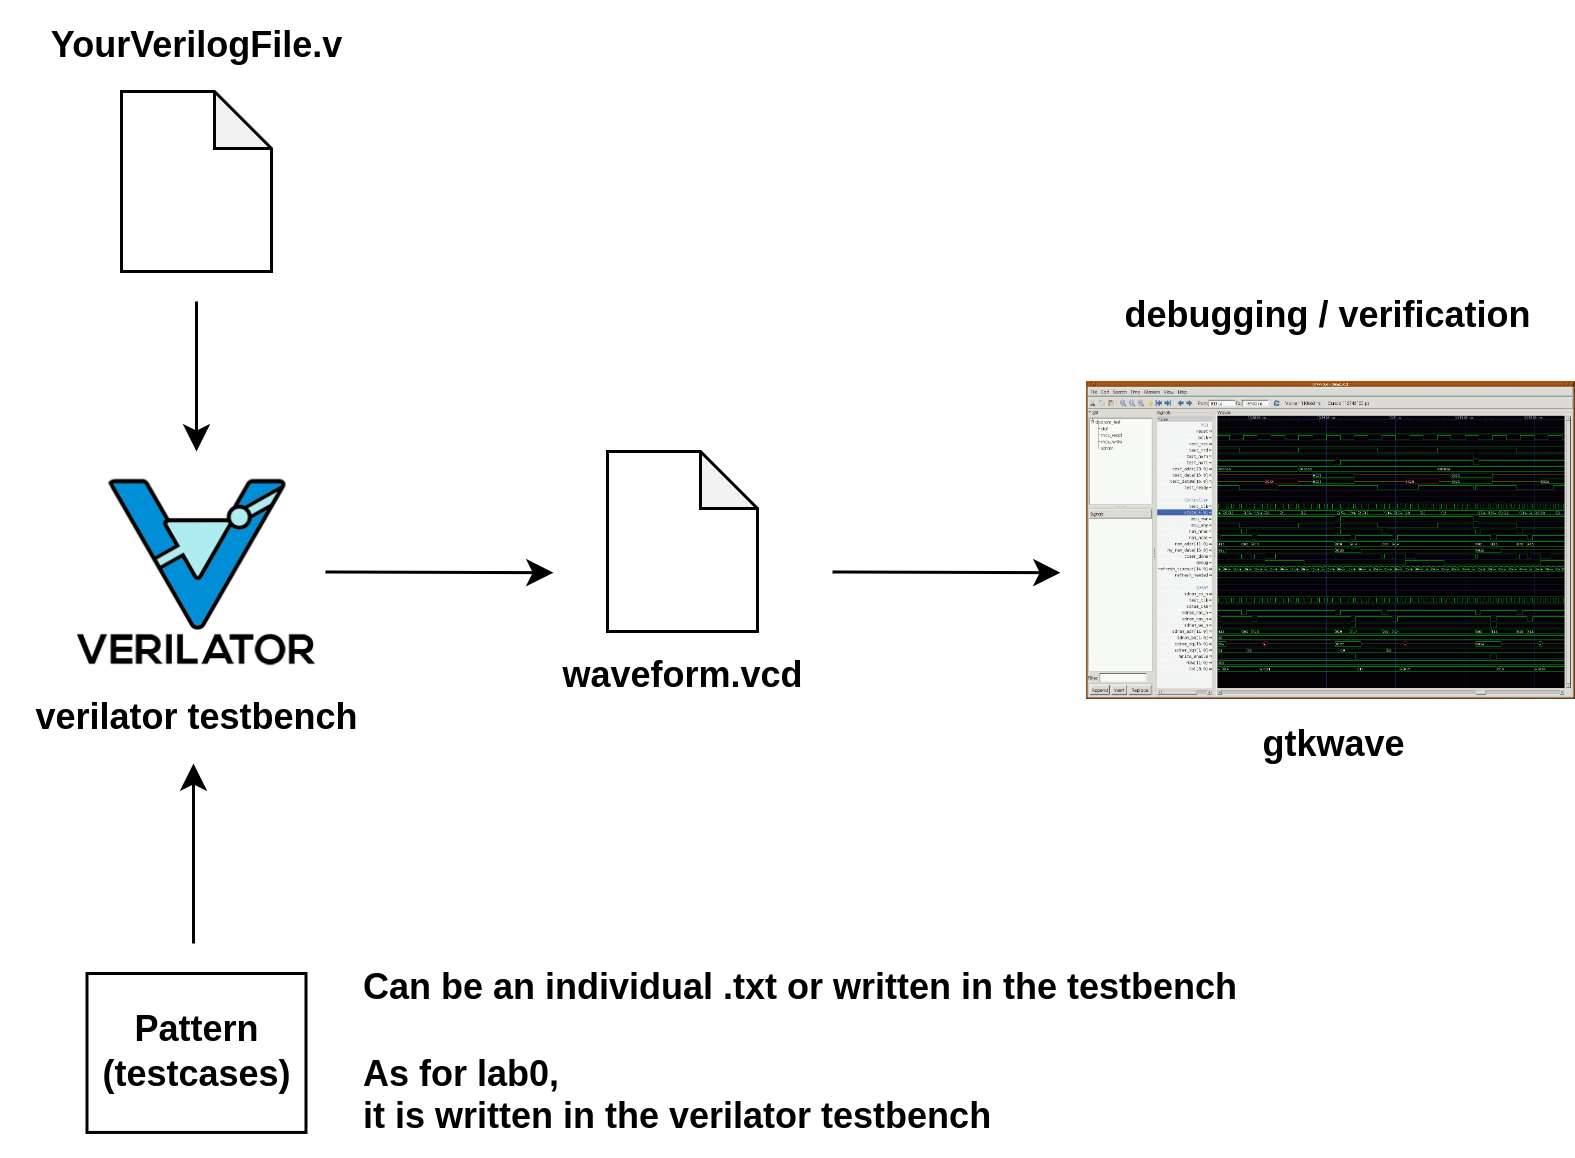
In subsequent labs, we will make extensive use of tools like Verilator and GTKWave, along with concepts of testbenches and patterns. Below is the development flowchart for the upcoming sessions.

“YourVerilogFile.v” will be the assignment you have completed, commonly referred to as the DUT (Device Under Test). We will place it alongside a pattern (testcase) on a testbench for testing, and use the Verilator for simulation and verification, eventually generating a waveform file “waveform.vcd”(for example). If your module fails the testbench verification, you can use GTKWave to open the waveform file for debugging, trace the error, and make the necessary changes.
Verilator#
Verilator is an open-source Verilog simulation tool that you will use for RTL functional simulation to validate the RTL code you have written.
Installation#
How to install : https://verilator.org/guide/latest/install.html (Recommended to install in the Ubuntu environment.)
# Prerequisites:
sudo apt-get install git perl python3 make autoconf g++ flex bison ccache
sudo apt-get install libgoogle-perftools-dev numactl perl-doc
sudo apt-get install libfl2  # Ubuntu only (ignore if gives error)
sudo apt-get install libfl-dev  # Ubuntu only (ignore if gives error)
sudo apt-get install zlibc zlib1g zlib1g-dev  # Ubuntu only (ignore if gives error)

git clone https://github.com/verilator/verilator   # Only first time

# Every time you need to build:
unsetenv VERILATOR_ROOT  # For csh; ignore error if on bash
unset VERILATOR_ROOT  # For bash
cd verilator
git pull         # Make sure git repository is up-to-date
git tag          # See what versions exist
git checkout v5.008  # Switch to specified release version

autoconf         # Create ./configure script
./configure      # Configure and create Makefile
make -j `nproc`  # Build Verilator itself (if error, try just 'make')
sudo make install
You need to install version 5.008. After a successful installation, run the following command to check if the installation was successful and if the version is correct.
verilator --version
The Verilator manual contains a C++ example that you can locate. Follow the steps in the example to learn how to use it.
Full Adder & ALU#
1. Full Adder#
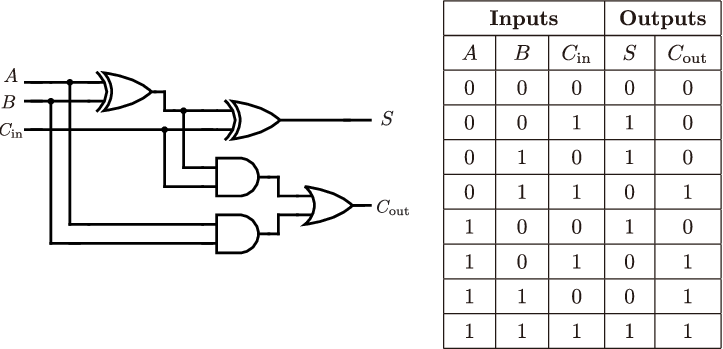
Based on the circuit of the following adder, complete the circuit using Verilog, and create a testbench using Verilator to verify the circuit.

2. 4-bits ALU#
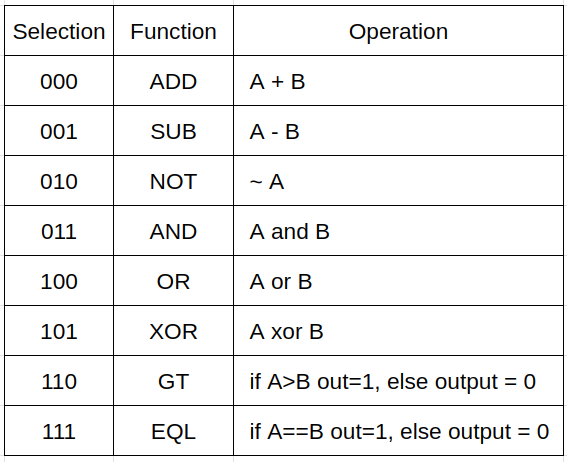
Based on the ALU function table below, complete the full ALU circuit using Verilog, and create a testbench using Verilator to verify the circuit.
// file name : alu.v
   module alu(input [3:0] a,
           input [3:0] b,
           input [2:0] s,
           output reg [3:0] y);

// implement your module here

endmodule

Warning
The ADD and SUB operations in the ALU must use the completed full adder circuit.
Warning
All operations are unsigned arithmetic.
Warning
To showcase one of Verilator’s functionalities, the testbench we provided for lab 0 contains assertion. If you encounter an assertion error and the testbench does not generate a waveform, you can comment out the assert() statement and get the waveform, but make sure to un-comment it when doing verification.
After implementing the above two circuits, use the “make” command to run the testbench and check if your design passes correctly!
Debug tool#
GTKwave#
https://gtkwave.sourceforge.net/
Verilator supports waveform tracing, enable waveform tracing through add code in testbench (cpp file) and compile add flag –trace
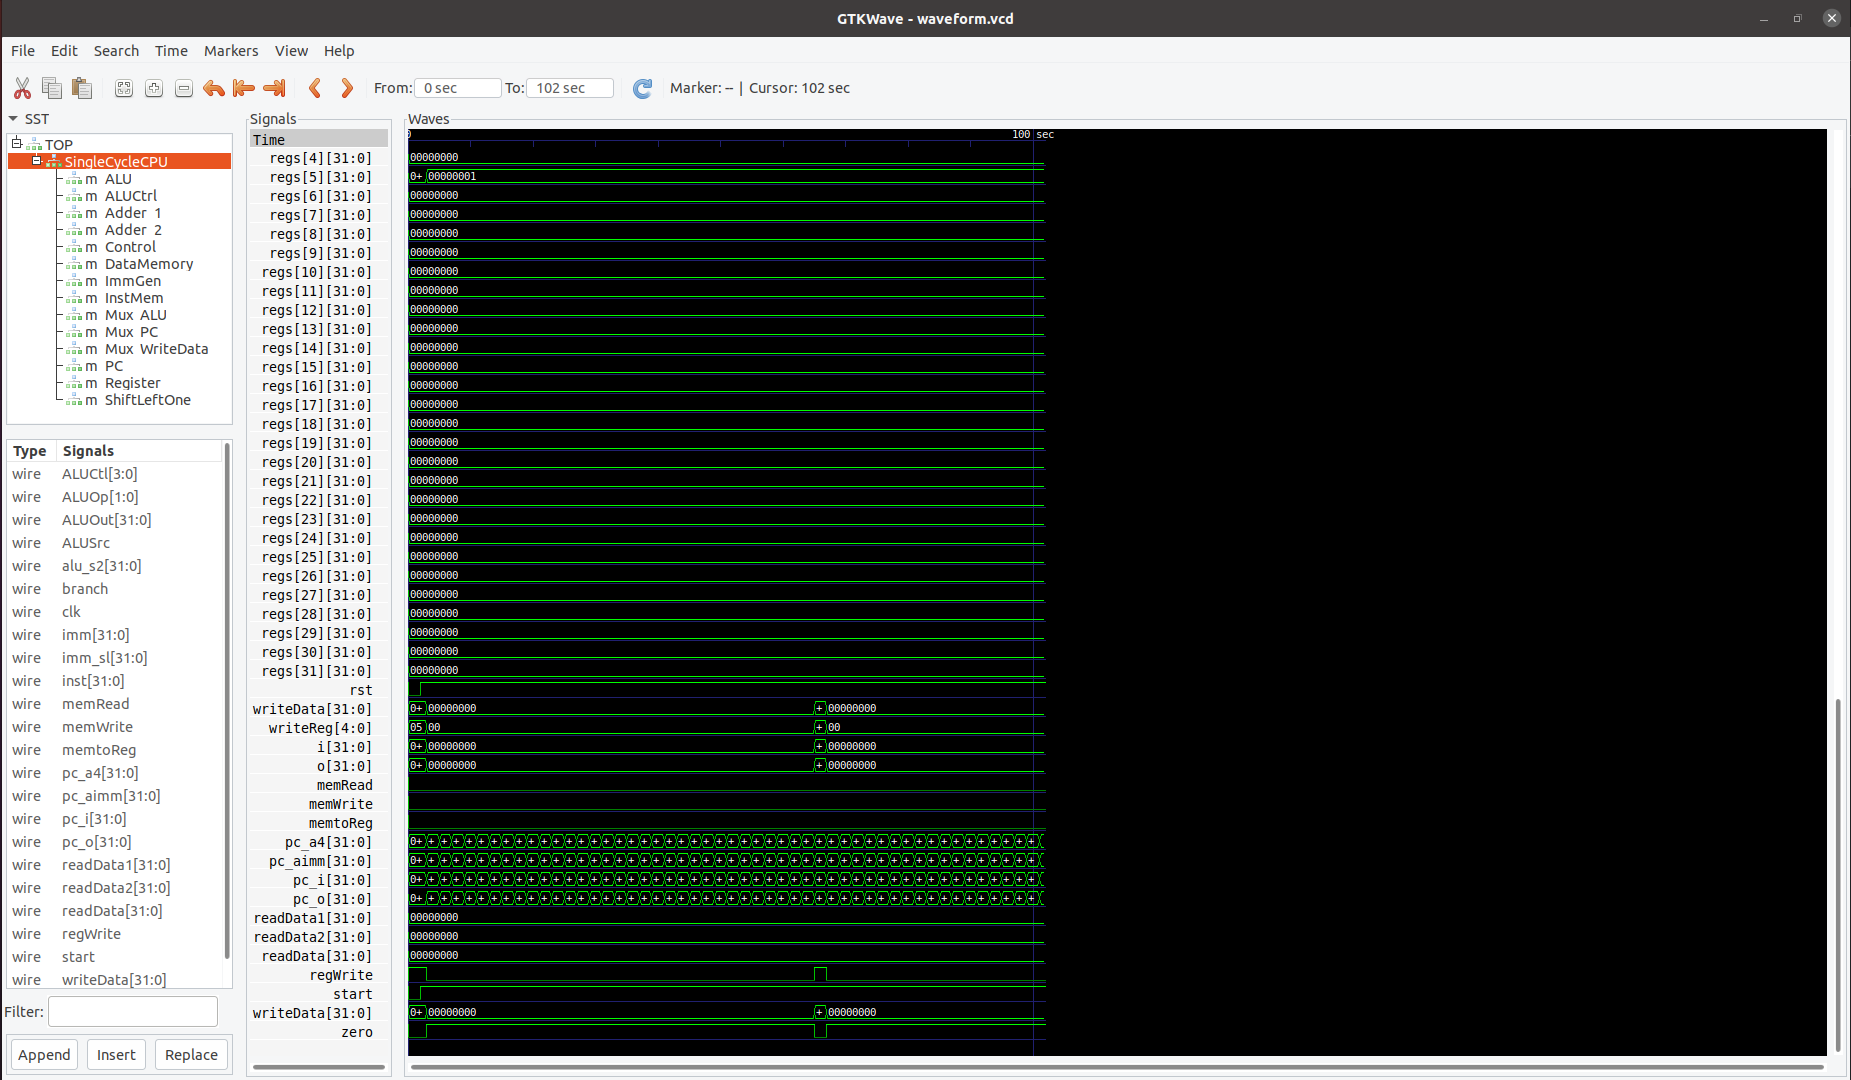
Using GTKwave to open .vcd file to check the waveform
1.
gtkWave # open UI directly

or

2.
gtkwave xxx.vcd # open UI with waveform
